

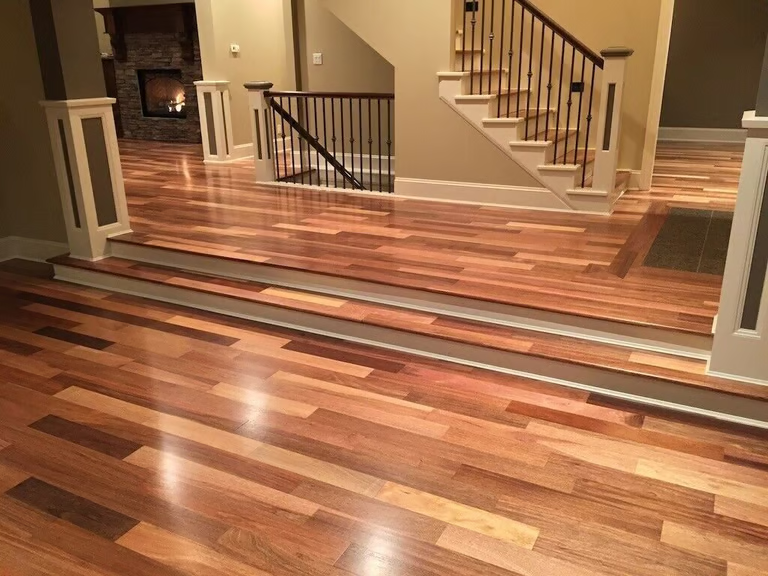
The installation of hardwood floors in your space is one of the best ways to improve your home’s beauty. The right installation, with the right tools and a little planning, can improve your desired elegance. Parquet Flooring Dubai provides expert installation services of these hardwood floors according to your preferences. In this guide, we will be discussing professional steps to install hardwood floors in your space.
Why There is need of Hardwood Floors?
Before making hardwood floor installation, you should know why hardwood floors are a great choice for home and commercial spaces.
- Hardwood floors bring timeless elegance by adding natural warmth.
- Hardwood floors last for decades if kept with proper care.
- These floors need little maintenance and can be swept or mopped.
- Buyers love these hardwood floors because they increase their home value.
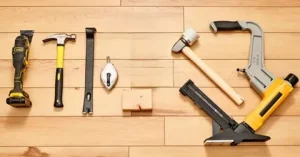
Tools Required
Before installing hardwood floors, make sure you have the following tools
- Measuring tape
- Pry bar
- Hammer or Rubber Mallet
- Chalk line
- Floor nailer or stapler
- Circular saw or miter saw
- Drill Machine
- Utility Knife
- Levelor
- Moisture Meter
Materials Required
- Hardwood planks
- Underlayment
- Vapor barrier
- Flooring Nails
- Wood Glue
- Spacers
- Transition Strips
Steps for a Proper Hardwood Installation
-
Choose the Right Hardwood
There are two types of hardwood flooring
Solid Hardwood
Solid hardwood is made from a single piece of wood and it can be refinished many times as per your needs.
Engineered hardwood
This hardwood flooring is crafted with a real hardwood top layer and plywood beneath it. This type is excellent for moisture-prone areas like basements and kitchens.
-
Acclimate the Wood
Hardwood floors usually adjust according to your room temperature and humidity. For this reason, you need to unbox the planks and let them sit in your room for 4-5 days. This will help planks resist more expansion or shrinking after floors installation.
-
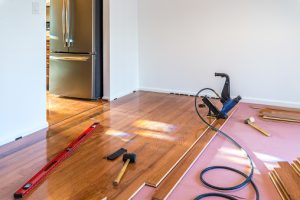
Prepare the Subfloor
Start the installation process by removing old flooring and thoroughly cleaning the subfloor. That floor should be
- Dry
- Flat
- Clean
- Structurally Sound
Use a level tool to check for dips and bumps. Sand down high spots or fill in low areas. If you are installing it over concrete, try applying a vapor barrier.
-
Install Underlayment
You should install an underlayment according to your floor and subfloor type. It will add cushioning, soundproofing and moisture protection features.
Roll out all the underlayment and secure it with tape. Keep avoiding overlaps.
-
Plan Your Layout
Measure your room and use a chalk line to mark the starting point for the installation. It is good to run the hardwood planks parallel to the longest wall or main light source. Make sure the layout allows for staggered seams and never align them side by side.
-
Begin the Installation
Nail Down Method
- Start your installation from the longest wall and leave almost a ½ gap for expansion that may occur in cold weather.
- You should nail the row through the tongue and close the wall.
- Fasten each plank with the help of a floor nailer.
- Stagger the seams between rows by cutting planks to length.
- Use a tapping block or a mallet to snug planks together.
Glue Down Method
- Consider applying the adhesive with a trowel in small sections.
- Press the planks into the glue.
- Use spacers to keep the expansion gap along walls.
- Wipe off any excess glue before it dries.
Floating Foor
- Attach the planks using a click lock system or by gluing the tongues.
- No nails or glue are needed in the subfloor in this method.
- Use a spacer around the room for expansion gaps.
-
Cut around Obstacles
Use a cutter or a jigsaw to cut planks around door frames, vents, and corners. Always double-check your measurements before cutting these planks.
-
Finishing Touches
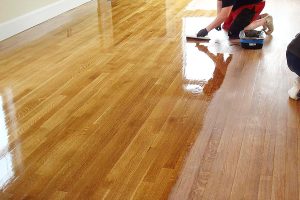
Once all planks are installed:
- Remove spacers.
- Install baseboards or quarter-round molding to cover expansion gaps.
- Add transition strips between hardwood and other flooring types.
Let the floor dry and settle for 24 hours before placing furniture on it.
Tips to get a professional finish
- Start installation in small sections
- Keep a clean workspace.
- Wear knee pads to avoid any injury.
- Mix planks from different boxes to vary color and grain.
- Keep temperature and humidity stable throughout the installation.
Conclusion
Installation of hardwood floors may seem like a difficult and big job, but if it is done in steps, it becomes totally doable. These floors bring stunning results that transform your space. Hire a professional, in case DIY becomes too much to handle. You can achieve the kind of results you want on your floors without any trouble, as it can be achieved seamlessly with right tools.
Looking for professional flooring installation? Contact Parquet Flooring Dubai to get hassle-free and seamless hardwood floor installation at your doorstep.


